The BEST Homemade Crunch Bars Recipe
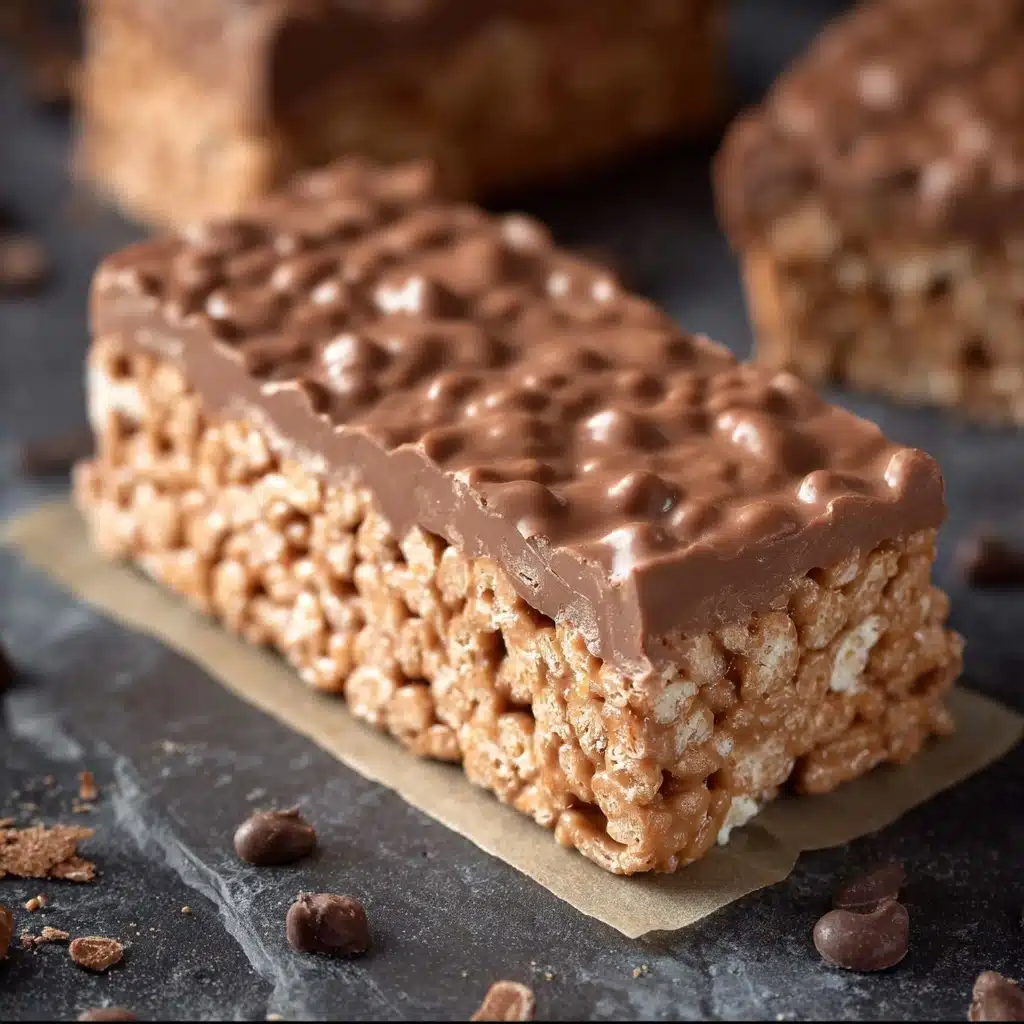
If you are a fan of sweet, crunchy treats that combine nostalgic vibes with simple, wholesome ingredients, then you are in for a real treat. The BEST Homemade Crunch Bars offer that perfect harmony of chocolatey richness, nutty warmth, and crisp texture all wrapped up in one delicious bite. These bars are wonderfully easy to make, combining pantry staples that come together quickly but deliver an unforgettable flavor and crunch that everyone will love. Whether for a quick snack or a dessert, they are the go-to homemade favorite that you will want to make again and again.
Ingredients You’ll Need
The magic of The BEST Homemade Crunch Bars lies in their simplicity. Each ingredient plays an essential role, bringing a new layer of taste, texture, or color to the bars without any fuss.
- 3 cups crispy rice cereal: Provides the all-important crunchy texture that defines these bars and gives them their light, airy feel.
- 1 1/2 cups chocolate chips: Adds decadent, melty chocolate that binds everything together and keeps those crunchies irresistibly rich.
- 1 cup peanut butter: Offers a creamy, nutty depth; you can swap this for any nut or seed butter to fit your taste or dietary preferences.
- 1/2 cup maple syrup: Acts as the natural sweetener, blending the bars beautifully with a subtle caramel note.
- 1/4 cup coconut oil: Helps to melt and unify the ingredients, while adding a slight hint of tropical flavor—you can also substitute grass-fed butter if you prefer.
How to Make The BEST Homemade Crunch Bars
Step 1: Prepare Your Baking Dish
First things first, line an 8 x 8-inch baking dish or a deep baking tray with parchment paper. This step is a game changer because it prevents the bars from sticking, making removal and cutting a breeze later on. Set the dish aside once lined to prepare your ingredients.
Step 2: Mix Your Base Ingredients
Pour the crispy rice cereal into a large mixing bowl and set it ready to receive the luscious chocolate mixture. In a microwave-safe bowl or on the stovetop, combine the chocolate chips, peanut butter, maple syrup, and coconut oil. Gently heat this mixture until everything is melted and smooth. Once melted, whisk until the chocolate, nut butter, and syrup are fully incorporated for a silky consistency.
Step 3: Combine and Chill
Pour the luscious chocolate and nutty mixture over the crispy rice cereal, then gently fold together, making sure every crunchy piece is coated. Transfer this sticky, fabulous mixture into your parchment-lined dish, pressing it down evenly to create a uniform thickness. Pop the dish into the refrigerator to chill until firm, which takes at least an hour—this crucial chill step locks in the perfect crunch and chewiness.
Step 4: Cut and Enjoy
Once the bars are completely set, lift them out easily using the parchment paper. Cut into your favorite-sized bars or squares. These bars hold together well but have just the right amount of crumble, making each bite delightfully satisfying.
How to Serve The BEST Homemade Crunch Bars

Garnishes
While these bars are fantastic all on their own, you can elevate their look and flavor with a few simple garnishes. Try sprinkling flaky sea salt on top before chilling for a sophisticated sweet-salty twist or drizzle some melted white chocolate over the bars just before setting for an extra visual pop.
Side Dishes
These crunch bars love excellent company. Serve them with a scoop of vanilla ice cream or alongside a hot cup of coffee or tea to balance the richness. Fresh berries or sliced bananas also work beautifully, adding a refreshing contrast to every bite.
Creative Ways to Present
Get playful by cutting the bars into bite-sized squares or fun shapes with cookie cutters for parties or lunchbox treats. Wrap individual portions in parchment paper tied with a colorful ribbon for gifting—no one can resist a homemade sweet surprise!
Make Ahead and Storage
Storing Leftovers
The BEST Homemade Crunch Bars keep wonderfully in an airtight container at room temperature or in the fridge for up to a week. Keeping them covered ensures they stay fresh and retain that satisfying crunch without becoming soft or sticky.
Freezing
If you want to make these bars in a big batch, they freeze beautifully. Wrap individual pieces tightly in plastic wrap and place them in a freezer bag or container. When stored properly, they will maintain their taste and texture for up to 3 months.
Reheating
Since these bars are best enjoyed at room temperature or chilled, reheating is generally unnecessary. However, if you like them a little softer, let the frozen bars thaw at room temperature for about 30 minutes, or briefly warm them in your hand before digging in.
FAQs
Can I use a different nut butter instead of peanut butter?
Absolutely! Almond butter, cashew butter, sunflower seed butter, or any other creamy nut or seed butter will work just as well and add a unique twist to the flavor.
Is it possible to make these bars vegan?
Yes, simply ensure you use dairy-free chocolate chips and substitute butter with coconut oil or another plant-based fat to keep the bars fully vegan-friendly.
How crunchy are these bars?
They have a perfect crunchy-kissed texture thanks to the crispy rice cereal, balanced by the smooth, melty chocolate and peanut butter mix. The chill time helps maintain that fantastic crunch.
Can I use honey instead of maple syrup?
Honey can be used as a natural sweetener alternative. It will add a slightly different flavor, but the bars will still turn out fantastic and sticky enough to hold together well.
What is the best way to cut the bars without crumbling?
Use a sharp knife and cut when the bars are fully chilled from the fridge. Press the knife down firmly in a single motion rather than sawing back and forth to avoid crumbling.
Final Thoughts
Making The BEST Homemade Crunch Bars is one of those joyful kitchen experiences where a handful of simple ingredients come together to create something truly special. With their delightful crunch, gooey chocolate, and nutty goodness, these bars are sure to become one of your favorite staples for snacking, dessert, or gifting. I can’t wait for you to try them and share in the happiness these bars bring to every bite!
PrintThe BEST Homemade Crunch Bars Recipe
These homemade Crunch Bars are a deliciously simple treat combining crispy rice cereal with a smooth blend of peanut butter, chocolate, maple syrup, and coconut oil. Perfect for a quick snack or an energizing dessert, they are easy to make and satisfy cravings with a perfect crunch and rich flavor.
- Prep Time: 10 minutes
- Cook Time: 5 minutes
- Total Time: 1 hour 15 minutes
- Yield: 12 bars 1x
- Category: Snack, Dessert
- Method: No-bake, Refrigeration
- Cuisine: American
- Diet: Vegetarian
Ingredients
Base
- 3 cups crispy rice cereal
Chocolate Mixture
- 1 1/2 cups chocolate chips
- 1 cup peanut butter (can substitute any nut or seed butter)
- 1/2 cup maple syrup
- 1/4 cup coconut oil (can substitute for grass-fed butter)
Instructions
- Prepare the Baking Dish: Line an 8 x 8-inch baking dish or any deep baking tray of your choice with parchment paper. This will prevent the bars from sticking and make removal easier.
- Melt the Chocolate Mixture: In a microwave-safe bowl or on the stovetop, combine the chocolate chips, peanut butter, maple syrup, and coconut oil. Heat gently until everything is melted and smooth. Remove from heat and whisk thoroughly to ensure the mixture is fully incorporated and silky.
- Combine with Cereal: Pour the melted chocolate and peanut butter mixture over the crispy rice cereal in a large mixing bowl. Stir carefully until the cereal is evenly coated with the chocolate mixture.
- Set the Bars: Transfer the coated cereal mixture into the lined baking dish, spreading it out evenly. Place in the refrigerator and chill until firm, which typically takes at least one hour.
- Cut and Serve: Once set, remove the slab from the dish using the parchment paper edges, place on a cutting board, and cut into bars of your preferred size. Serve immediately or store in an airtight container in the fridge.
Notes
- You can substitute peanut butter with almond butter or sunflower seed butter for different flavors or to accommodate allergies.
- Using dark chocolate chips can reduce sugar content slightly and add a richer chocolate flavor.
- Ensure to press the mixture firmly into the pan to help the bars stay together when cut.
- Store the bars in the refrigerator to maintain their firmness and freshness; they can be kept for up to one week.
- For a vegan version, confirm that your chocolate chips are dairy-free.
Nutrition
- Serving Size: 1 bar (approximately 40g)
- Calories: 180
- Sugar: 12g
- Sodium: 45mg
- Fat: 11g
- Saturated Fat: 5g
- Unsaturated Fat: 6g
- Trans Fat: 0g
- Carbohydrates: 18g
- Fiber: 1g
- Protein: 3g
- Cholesterol: 0mg
Keywords: homemade crunch bars, no bake snack, peanut butter bars, chocolate rice cereal bars, easy dessert