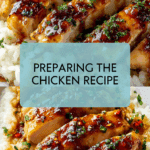
Preparing the Chicken Recipe
Get ready to fall in love with one of the most satisfying weeknight dinners around: Honey Garlic Chicken Breasts. With juicy chicken enveloped in a glossy, sweet-and-savory sauce, this dish is always a crowd-pleaser at my table. The secret lies in the thoughtful process of preparing the chicken, building those layers of flavor, and finishing everything with that irresistibly sticky sauce. Whether you’re a seasoned cook or just getting comfortable in the kitchen, this is a recipe you’ll want to make again and again!

Ingredients You’ll Need
Here’s the magic of this dish: the ingredient list is refreshingly short, but each item is chosen for maximum impact. Every component works together to create that beautiful harmony of flavors, from the juicy chicken to the caramelized sauce. These kitchen staples will deliver a restaurant-worthy meal in your own home!
- Chicken breasts: Boneless, skinless chicken breasts are tender and their mild flavor soaks up the sauce perfectly.
- Fresh garlic (4 cloves, minced): Nothing compares to fresh garlic for a warm, aromatic kick that defines the sauce.
- Local honey (2 tablespoons): Adds gentle sweetness and helps create that sticky, glossy coating you love.
- Soy sauce (3 tablespoons): The umami backbone of the sauce, balancing out the sweet honey with depth and saltiness.
- Butter (2 tablespoons): Brings richness to the sauce and helps deliver a stunning sear on the chicken.
- Olive oil (1 tablespoon): Keeps things light and helps prevent your butter from burning during searing.
- Salt and pepper to taste: Simple seasoning to bring out all the natural flavors in the chicken.
- Flour (2 tablespoons): Lightly dusting the chicken helps form a beautiful golden crust while thickening the sauce ever so slightly.
How to Make Preparing the Chicken
Step 1: Preparing the Chicken Cutlets
This is the foundation for the entire dish! For preparing the chicken, start by carefully slicing your chicken breasts horizontally so you end up with evenly sized cutlets. This helps them cook faster and more evenly, ensuring juicy results. Pat each piece dry with a paper towel—this is a little chef’s trick for a gorgeous sear! Sprinkle both sides with a generous amount of salt and pepper, then give them a light dusting of flour. This not only creates a golden crust when they hit the skillet, but also adds a subtle thickness to your sauce later on.
Step 2: Creating the Perfect Sear
Set your skillet over medium-high heat and add the olive oil with half the butter. Once it’s shimmering and hot, carefully lay each cutlet in a single layer—don’t overcrowd the pan! The trick to preparing the chicken with that scrumptious golden exterior is to let it cook undisturbed for 4-5 minutes per side. Flip once, and you’ll be rewarded with perfectly cooked, caramelized chicken that’s tender and flavorful. At this point, transfer the cooked pieces to a plate and get ready to work some magic with the pan drippings.
Step 3: Building the Sauce
After removing the chicken, drop in the rest of your butter over low heat. As it melts, add the minced garlic, stirring constantly for about 30 seconds—it grows deeply fragrant and infuses every bite with flavor. Pour in the soy sauce, making sure to gently scrape up any browned bits stuck to the bottom; they’re packed with savory goodness. This stage is so important for preparing the chicken sauce that will coat every morsel in the dish.
Step 4: Finishing the Dish
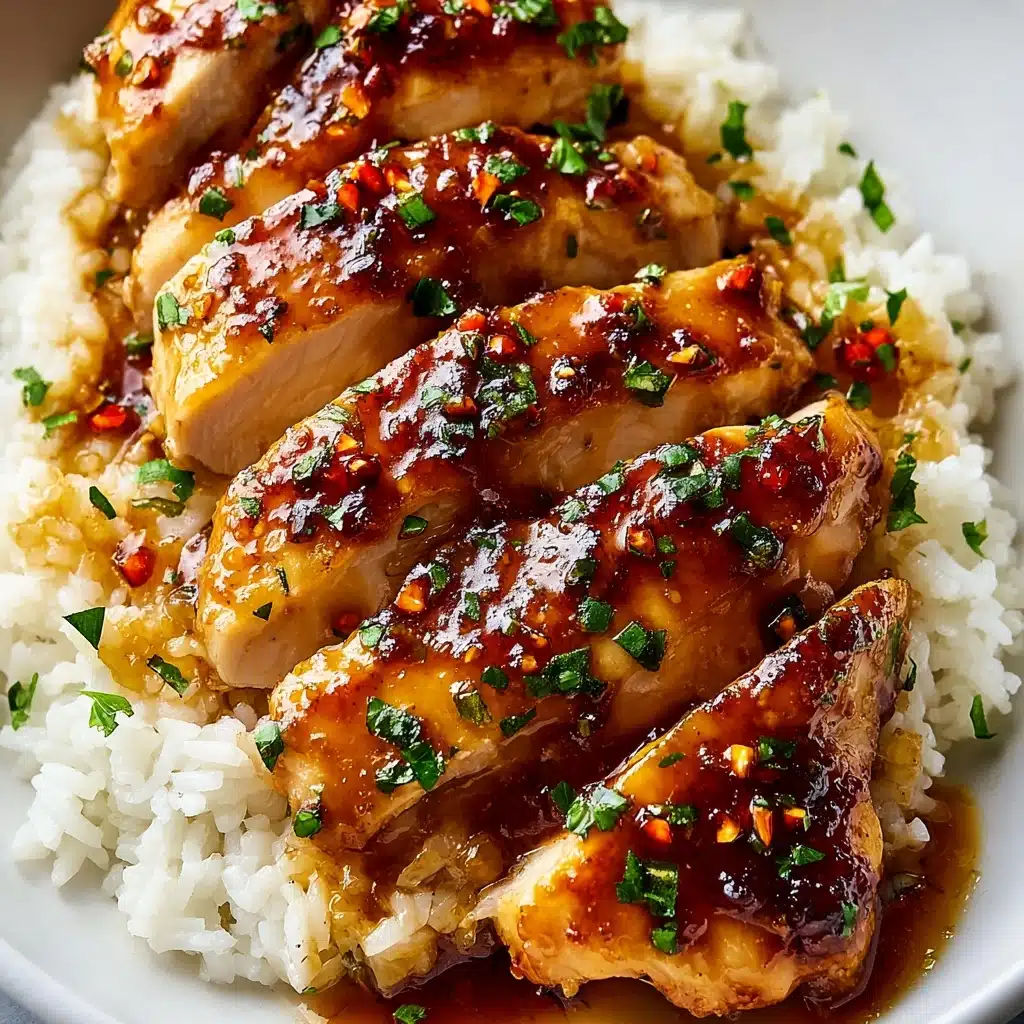
Whisk in the honey and allow the sauce to gently simmer for 2-3 minutes. It will thicken just enough to cling beautifully to the chicken. Slide your chicken cutlets back into the pan, spooning sauce generously over each one. Let everything bubble together for a couple minutes, so the meat soaks up all that delicious flavor. This final step is the heart of preparing the chicken for maximum tenderness and rich, sticky goodness.
Step 5: Serve and Enjoy!
Once your chicken is lacquered in that glossy sauce and everything smells irresistible, it’s time to plate up! For the most drool-worthy results, serve the chicken hot, spooning extra sauce over the top. Whether you go for simple rice, fluffy noodles, or something bright and green on the side, you’re in for a treat!
How to Serve Preparing the Chicken
Garnishes
The right garnish turns preparing the chicken into an eye-catching centerpiece. Sprinkle with a tangle of chopped fresh parsley for color, or scatter thinly sliced green onions for an extra bit of bite. Toasted sesame seeds add a lovely crunch, and a pinch of cracked black pepper at the end ensures you get that just-cooked aroma with every forkful.
Side Dishes
My favorite way to serve preparing the chicken is with simply steamed jasmine rice that soaks up all that honey garlic sauce. It’s equally delicious with fluffy quinoa, buttery mashed potatoes, or even stir-fried veggies for a lighter pairing. If you want something heartier, try garlic noodles or a crisp green salad with a tangy dressing to contrast the sweet richness of the chicken.
Creative Ways to Present
Let’s have some fun! Try slicing preparing the chicken into bite-sized strips and layering over a bed of sautéed greens for a fresh, modern grain bowl. Or tuck warm pieces into a toasted baguette for an impressive honey garlic chicken sandwich. Serve them family-style on a big platter if you’re feeding a crowd—everyone will be drawn to that gorgeous glaze!
Make Ahead and Storage
Storing Leftovers
If you find yourself with leftover preparing the chicken (lucky you!), let it cool completely before storing. Place the chicken and extra sauce in an airtight container and refrigerate for up to 3 days. Having the sauce in there is key—it keeps the chicken moist and flavorful until you’re ready for round two.
Freezing
You can absolutely freeze preparing the chicken for later enjoyment. Arrange the cooled chicken and sauce in a freezer-safe container or bag, pressing out as much air as possible. It will keep well for up to 2 months. Just be sure to thaw it gently overnight in the fridge for the best texture when reheating.
Reheating
To reheat preparing the chicken without drying it out, warm it gently in a covered skillet over low heat, adding a splash of water or chicken broth if needed to loosen the sauce. You can also microwave individual servings, but do so in short bursts, stir in between, and watch for hot spots. The flavors are even deeper on day two!
FAQs
Can I use chicken thighs instead of breasts?
Absolutely! Chicken thighs are incredibly juicy and forgiving in this recipe. Just be sure to adjust the cooking time slightly—thighs may take a few extra minutes to reach perfect tenderness, but the process of preparing the chicken remains the same.
Is it possible to make this gluten-free?
Yes! Simply swap out the flour for your favorite gluten-free blend or cornstarch when preparing the chicken, and use tamari instead of regular soy sauce. You’ll get the same sticky, savory sauce without any gluten concerns.
What’s the best way to get that golden sear?
The secret is preparing the chicken cutlets to be totally dry, then dredging lightly with flour. Make sure your skillet is properly heated before adding the meat, and let each side cook undisturbed—this is what gives you that iconic golden crust!
Can I double the sauce for extra drizzling?
If you’re a sauce lover (aren’t we all?), it’s easy to double all the sauce components to make enough for drizzling over rice or veggies. The chicken will still soak up plenty of flavor and you’ll have more to enjoy at the table.
How can I tell when the chicken is cooked through?
The safest and most reliable way is by using an instant-read thermometer. Your chicken is perfectly cooked at 165°F in the thickest part. It should look golden-brown on the outside and have no pink in the middle. Preparing the chicken this way guarantees juicy, successful results every time.
Final Thoughts
If you’re searching for a dinner winner, preparing the chicken this way is a must-try. It’s quick enough for busy evenings, but special enough to make any meal a little more memorable. So grab a skillet and treat yourself—once you taste that honey garlic glaze, you’ll keep this recipe close at hand!
PrintPreparing the Chicken Recipe
These Honey Garlic Chicken Breasts are a delicious combination of sweet and savory flavors. Tender chicken breasts are seared to perfection and coated in a sticky honey garlic sauce that’s sure to impress.
- Prep Time: 15 minutes
- Cook Time: 15 minutes
- Total Time: 30 minutes
- Yield: 4 servings 1x
- Category: Main Course
- Method: Searing, Simmering
- Cuisine: Asian
- Diet: Non-Vegetarian
Ingredients
Chicken Breasts:
- 4 chicken breasts
Fresh Garlic:
- 4 cloves fresh garlic, minced
Local Honey:
- 2 tablespoons local honey
Soy Sauce:
- 3 tablespoons soy sauce
Butter:
- 2 tablespoons butter
Olive Oil:
- 1 tablespoon olive oil
Salt and Pepper:
- To taste
Flour:
- 2 tablespoons flour
Instructions
- Preparing the Chicken Slice the chicken breasts horizontally into cutlets. Pat them dry with paper towels, then season both sides with salt and pepper. Lightly dust the chicken with flour to help with the searing process.
- Creating the Perfect Sear Heat the olive oil and 1 tablespoon of butter in a skillet over medium-high heat. Once hot, place the chicken in the pan and cook undisturbed for 4-5 minutes, allowing a golden sear to form. Flip the chicken and cook for another 3-4 minutes, or until it reaches an internal temperature of 165°F and is golden brown on both sides. Remove the chicken from the skillet and set it aside.
- Building the Sauce Lower the heat and add the remaining butter to the skillet. Once the butter melts, add the minced garlic and stir constantly for about 30 seconds, allowing it to become fragrant. Pour in the soy sauce, scraping up any browned bits from the bottom of the pan with a wooden spoon.
- Finishing the Dish Whisk in the honey and allow the sauce to simmer for 2-3 minutes, or until it thickens slightly. Return the chicken to the pan, spooning the sauce over each piece to coat it. Simmer for another 2-3 minutes to ensure the chicken is fully cooked through and has absorbed the flavors of the sauce.
- Serve and Enjoy Once the chicken is cooked and the sauce is thickened, serve the chicken hot, spooning the sauce over the top. Pair it with your favorite sides like rice, steamed vegetables, or noodles.
Nutrition
- Serving Size: 1 chicken breast
- Calories: 320
- Sugar: 8g
- Sodium: 780mg
- Fat: 14g
- Saturated Fat: 5g
- Unsaturated Fat: 7g
- Trans Fat: 0g
- Carbohydrates: 12g
- Fiber: 1g
- Protein: 35g
- Cholesterol: 110mg
Keywords: Honey Garlic Chicken, Chicken Breast Recipe, Honey Garlic Sauce